AI Video Generation for Beginners: Where to Start
AI video generation can feel like a wall of new terms, flashy demos, and tools that all promise magic. The good news is that your first usable video does not need to be cinematic, fully automated, or built with the most advanced model on the market. A beginner can go from idea to publishable clip fast by picking one simple project, one tool that matches that project, and one workflow they can repeat. That matters more than chasing every new release.
There is also real evidence that the learning curve is shorter than it looks. A YouTube tutorial titled “You’re Not Behind Yet: How to Start Making AI Videos in 17 Minutes” captures something true about the current moment: beginners can get moving quickly if they focus on a narrow first win. The fastest path is not mastering everything. It is learning how different tool types work, what kind of output each one is good at, and where AI still needs your editing hand to finish the job.
AI video generation beginner guide: what to learn first before choosing a tool
The difference between text-to-video, image-to-video, and avatar video tools
The first thing to understand in any solid ai video generation beginner guide is that “AI video” is not one category. It is really three practical lanes, and picking the wrong lane creates most beginner frustration.
Text-to-video tools generate footage from written prompts. You describe a subject, action, environment, camera look, and mood, and the model creates a clip. These tools are best when you want original visuals, concept scenes, stylized B-roll, or short storytelling shots. They are not always the easiest option for a first project because they can drift away from your prompt or change details between shots.
Image-to-video tools start with a still image and animate it. This is usually easier when you already know what the scene should look like. If you have a product photo, character art, or branded visual, image-to-video often gives more control because the model has a concrete reference. That matters for consistency.
Avatar or talking-head tools generate a presenter-style video, usually from a script. Instead of creating cinematic scenes, they focus on a person on screen speaking to camera. If you want explainers, quick updates, faceless content, or a presenter without filming yourself, this is often the simplest entry point. Community recommendations have repeatedly pointed beginners toward AI avatars and AI characters for exactly that reason, with BIGVU mentioned as one tool to try.
What a simple beginner workflow looks like
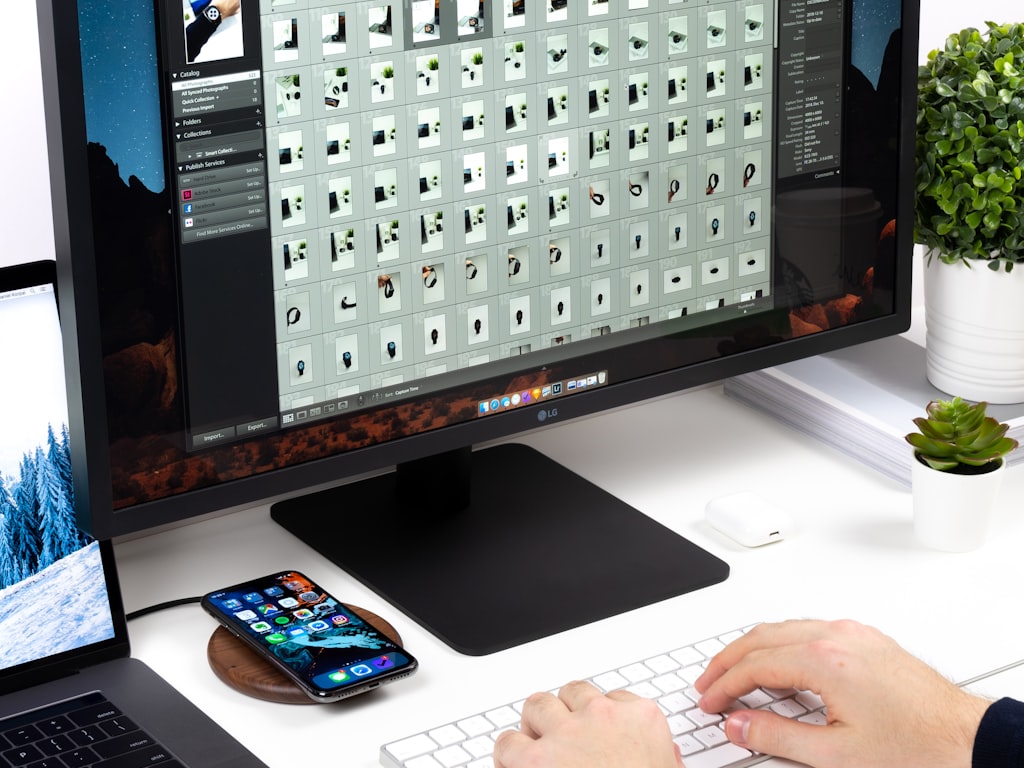
A practical beginner workflow is much simpler than most people expect: idea, script, visual input, generation, editing, export, publishing. If you follow those six stages, you avoid getting stuck in endless tool hopping.
Start with one idea that can fit in 15 to 45 seconds. Then write a short script or shot list. Next, decide your visual input: are you prompting from scratch, animating an existing image, or using an avatar to speak your text? After that, generate your raw clips. Then edit them together, add captions, branding, transitions, and music. Finally, export for the platform you actually plan to use and publish.
This sequence matters because beginners often try to solve editing, prompting, branding, and distribution at the same time. That usually leads to weak results and wasted time. A clean workflow keeps the project moving.
Set expectations early. AI can generate impressive footage fast, but output quality still varies. A clip may have strong motion and composition but weak text rendering. An avatar may read smoothly but still need pacing edits. A generated sequence may look great as a three-second shot but not hold up for a full minute without cuts. Manual editing is still useful, especially for tightening rhythm, removing awkward generations, and making the final video feel intentional.
One of the best lessons to learn early is prompt adherence: how closely a tool follows what you asked for. That skill beats a giant feature list. If you know how a model behaves, how specific to be, and when to simplify a request, you will get usable footage faster than someone who chooses a bloated tool with dozens of options they do not understand yet.
Best tools in this ai video generation beginner guide for your first project
Best easy tools for templates and fast editing
If the goal is getting a first video published without friction, template-first tools are the strongest starting point. Canva and InVideo stand out here because they reduce setup time and remove a lot of editing guesswork. That matches beginner community advice, where Canva is often recommended for simple video editing and InVideo for creating videos with templates.
Canva works especially well when you need to assemble clips into something polished quickly. Its marketing video maker is positioned for demo videos, testimonials, and other marketing videos for popular social platforms. That makes it useful for creators and business owners who need practical outputs rather than experimental art. You can bring in AI-generated clips, drop them into a template, add captions, apply brand colors, and export in the right aspect ratio without learning a full editing suite.
InVideo is strong when you want speed and structure. Templates help you avoid the blank-canvas problem, which is one of the biggest beginner blockers. Instead of building every sequence manually, you can start from a layout designed for social posts, explainers, promos, or short ads, then swap in your script and visuals. For a first project, that shortcut matters more than advanced controls.
BIGVU deserves a place here for a different reason. If your easiest path is a talking-head style video and you do not want to film yourself, AI avatar workflows are often the least intimidating. You write the script, choose the presentation style, and generate a speaker-led video that feels structured from the start. That is why beginner advice regularly points to avatar videos and tools like BIGVU as a low-friction entry point.
Best tools for prompt accuracy and image consistency
When you move beyond templates and want generated footage to match your idea more closely, prompt behavior becomes the key factor. Zapier’s 2026 roundup called Google’s Veo 3.1 “the best AI video generation all-arounder on the market,” specifically highlighting strong prompt adherence and the ability to stick close to your image. For beginners, that is not just a nice feature. It solves one of the most common problems: asking for one thing and getting something almost right but not actually usable.
If you are creating visual storytelling clips, concept scenes, or image-led generations, Veo 3.1 is notable because predictability saves time. You do not need a tool with the longest features page if it fails to follow your prompt. You need a tool that gives you footage you can actually edit into a finished piece.
Project type should drive your tool choice. Use Canva or InVideo when the job is social content, demo videos, testimonials, or lightweight marketing videos. Use BIGVU or another avatar platform when the job is a presenter-led explainer without filming yourself. Use a higher-control generation tool such as Veo 3.1 when you want the visual itself to be generated and you care about prompt accuracy or staying close to a source image.
That is the simplest way to avoid hype traps. A viral tool demo can make everything look universal, but beginner success usually comes from matching the tool to the output: templates for assembly, avatars for explainers, and stronger generation models for visual storytelling.
How to pick your first AI video project and get results fast
The easiest beginner project types
Your first AI video project should be easy to finish, easy to judge, and easy to publish. The safest options are short social clips, simple explainers, AI avatar videos, demo videos, testimonials, and lightweight marketing videos. Each of these has a narrow purpose, which makes both prompting and editing easier.
Short social clips are ideal because they do not need long scene consistency. A 10- to 20-second sequence can survive on one strong idea, a few captions, and a clean ending. A simple explainer works well because the script provides structure. A demo video is beginner-friendly because the product or service gives you a clear visual focus. Testimonials and marketing snippets also work because Canva already supports those formats well with template-driven editing.
AI avatar and character videos are especially useful if you do not want to appear on camera. That is one of the strongest beginner shortcuts from the research: for talking-head style content, avatars can be the easiest first project. Instead of trying to generate multiple cinematic scenes, you create one clear presenter-led message. That lowers the complexity immediately.
When to start with product shots, explainers, or faceless videos
A smart way to start is by choosing one single-purpose output. Business-oriented workflows often begin with product shots, concept variations, or talking-head explainer content instead of full productions. That approach is practical because AI is strongest when the brief is narrow.
If you sell a product, start with product visuals or short demos. One business-use case mentions Pikes AI for quick product shots and concept variations, which is exactly the kind of focused task AI handles well. If you are a marketer, Canva can turn those assets into social-ready promos or testimonials. If you want ad-style output, Creatify.ai is presented specifically around making ads and videos fully using AI, so that is another focused path.
If you are a creator, faceless videos and short explainers are often the fastest route. You can pair a script with an avatar, or generate a few visual clips and package them into Shorts or Reels. The key is keeping the scope small. Do not try to build a complete content engine on day one.
Pick one use case and one platform first. For example: one 30-second YouTube Short, one Instagram Reel promo, or one talking-head explainer for a landing page. Once you can repeat that workflow, then expand. Most beginners stall because they try to solve long-form storytelling, branding, automation, voice, character consistency, and monetization all at once. A narrow first project gets you to finished work faster, and finished work teaches more than endless testing.
AI video generation beginner guide workflow: from prompt to finished video
How to write a prompt that gets usable footage
A reliable ai video generation beginner guide needs a prompt structure that is simple enough to repeat. The cleanest beginner formula is: subject, action, setting, camera style, lighting, duration, and output format.
For example: “A ceramic coffee mug on a wooden desk, steam rising gently, morning sunlight through a window, slow push-in camera movement, warm natural lighting, 5 seconds, vertical 9:16 for Shorts.” That is specific without being overloaded. It tells the model what the scene is, what happens, what it should feel like, how it should be framed, and where it will be published.
Prompt adherence matters because every unnecessary extra detail gives the model more chances to drift. This is one reason Veo 3.1 has drawn attention: Zapier specifically noted its strong prompt adherence and ability to stay close to an image. For a beginner, that means fewer wasted generations and more clips you can actually use.
To improve prompt adherence, use cleaner descriptions instead of cinematic word piles. Ask for one action, not five. Request one clear subject, not a crowded scene. If the tool accepts reference images, use them whenever consistency matters. Image-led generation is often easier than text-only generation when you need a specific character, product, or layout. Simpler scene requests usually outperform ambitious multi-part prompts.
A good beginner move is to generate three short variations of the same prompt instead of one long clip. Short clips are easier to review, easier to edit around, and less likely to break visually.
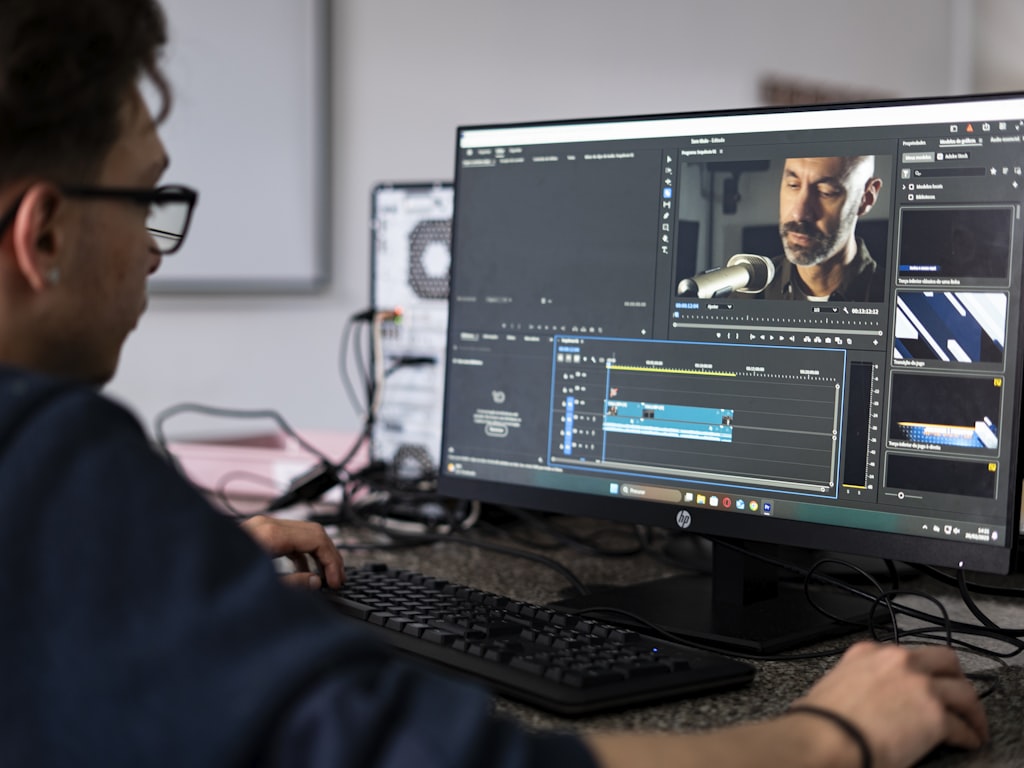
How to turn generated clips into a polished video
Once you have clips, the real quality jump comes from assembly. This is where template editing tools such as Canva or InVideo become powerful companions to generation tools. Bring your best clips into a template, trim out the awkward first and last half-second, add captions, place your logo or brand colors, and add music that matches the pacing.
For social content, arrange the strongest shot first. Attention drops fast, so your opening frame should show the product, presenter, or most striking visual immediately. Add text overlays that are large enough to read on a phone. Keep transitions simple. Fancy transitions often make AI footage feel less credible, not more.
If you are editing a talking-head or avatar video, tighten pauses and add cutaway visuals or captions every few seconds to maintain momentum. If you are assembling faceless visual clips, use text to guide the viewer through the idea: hook, proof, payoff, call to action.
Use this quick review checklist before export:
- Visual consistency: does the subject stay recognizable from clip to clip?
- Pacing: does each shot stay on screen only as long as it needs to?
- Legibility of text: can captions be read on a small mobile screen?
- Audio quality: is voice clear and is music too loud?
- Platform settings: does the export match the target aspect ratio, resolution, and length?
That last step matters more than many beginners expect. A polished 9:16 Short will outperform a great-looking clip exported in the wrong format. The best workflow is not generation alone. It is generation plus cleanup plus platform-aware editing.
Open source options in an ai video generation beginner guide
When open source AI video models make sense
If you are searching terms like open source ai video generation model, image to video open source model, or open source transformer video model, the appeal is usually control. Hosted tools are easier, but open source paths can make sense when you want deeper experimentation, custom workflows, or lower long-term cost after setup.
Running a model yourself can be useful if you want to test lots of outputs without usage caps, compare checkpoints, or integrate generation into a broader production system. It is also appealing if you want privacy over source assets or more freedom to tweak settings. For technical users, the ability to run ai video model locally can be a big advantage.
You may also come across searches for niche terms like happyhorse 1.0 ai video generation model open source transformer. Whether the model is niche or popular, the same beginner rule applies: choose open source because you need control or experimentation, not because it sounds more advanced. A hosted beginner tool will usually get you to a first publishable video much faster.
What to check before running a model locally
Before you commit to a local setup, verify the hardware requirements. Video generation models can demand a strong GPU, significant VRAM, storage space, and patience with installation. Also confirm what the model actually supports. Some are text-to-video. Some are image-to-video. Some are more like research demos than production tools.
Check the setup complexity too. If the install process requires command-line work, dependency troubleshooting, environment management, or manual model downloads, be realistic about the time cost. For many beginners, that time would be better spent creating videos in Canva, InVideo, or an avatar platform first.
Licensing is another non-negotiable step. Before using any open model for client work, ads, products, or monetized channels, review the open source ai model license commercial use terms carefully. “Open source” does not always mean unrestricted commercial use. Some licenses limit redistribution, brand use, or monetized applications.
A smart evaluation checklist looks like this:
- Does the model support text-to-video or image-to-video?
- Can your hardware run it at usable speeds?
- Is the setup process documented clearly?
- Are the outputs good enough for your target platform?
- Does the license permit your intended commercial use?
For most first-time creators, open source is better as a second-step exploration after learning a clean hosted workflow. Once you know what kind of videos you actually want to make, local models become easier to evaluate.
Publishing your first AI video: formats, platforms, and beginner mistakes to avoid

How to prepare AI videos for YouTube, Shorts, and social platforms
Publishing is where a lot of decent AI videos lose impact. The fix is simple: match the export to the destination. For YouTube Shorts, TikTok, and Instagram Reels, use vertical 9:16 and keep the pacing tight. For standard YouTube videos, horizontal 16:9 is usually the right choice. If the clip is a demo, testimonial, or social promo, Canva’s marketing video workflow is useful because it is built around those practical formats.
Length should match platform behavior. Shorts and Reels usually perform better when the point arrives fast. A product shot sequence, quick explainer, or avatar-led tip can work in under 30 seconds. Longer explainers can still work on YouTube, but they need stronger structure and cleaner editing.
Think about the first second. If the opener is vague, people scroll. Use a bold visual, a direct caption, or a spoken hook immediately. If the clip includes text, make sure it is large and high contrast. AI-generated visuals often look better than their captions unless you take time to format them properly.
For marketers, Canva is a practical publishing layer because its marketing video tools are aimed at demo videos, testimonials, and other social-ready marketing content. That means you can generate raw footage elsewhere, then use Canva to package it into something that feels native to the platform.
What to watch for with monetized or branded content
If monetization is part of the plan, stay alert to platform rules. One creator-focused YouTube source explicitly references new YouTube rules for AI videos while discussing how to make money with them. Policies evolve, and AI-assisted content can attract extra scrutiny when disclosure, reused material, synthetic people, or misleading presentation are involved. Branded content needs the same level of care. If you are making ads, testimonials, or client videos, do not assume AI changes the normal standards around truthfulness, rights, and platform compliance.
There are also classic beginner mistakes that are easy to avoid:
- Starting with overly complex prompts instead of one clear scene
- Skipping the edit because the generated clip “looks good enough”
- Choosing the wrong tool, like using cinematic generation for a simple presenter video
- Ignoring export settings and posting the wrong aspect ratio or resolution
- Forgetting to review text readability and audio balance on mobile
- Publishing without checking platform policy if the goal is monetization
The strongest beginner publishing habit is to test one format on one platform, review performance, and iterate. If a 20-second Short works, make three more with the same structure before expanding.
Conclusion
The fastest way to get started with AI video generation is not to master every tool or chase every new model release. It is to choose one simple project, one beginner-friendly tool, and one workflow you can repeat. A short social clip in Canva, a template-based explainer in InVideo, or an avatar-led video in BIGVU is a much better first win than an overcomplicated cinematic experiment you never finish.
As you improve, pay attention to prompt adherence, consistency, and editing discipline. Tools like Veo 3.1 stand out because they follow prompts more closely and stay near source images, which makes beginner results more predictable. But even the best generation still gets stronger when paired with clean assembly, captions, branding, and platform-aware export.
If you want a simple action plan, use this: pick one use case, write one short script, generate a few clips, polish them in a template editor, and publish to one platform. Then do it again. That repeatable cycle is the real foundation of an ai video generation beginner guide, and it is how your first AI video turns into a reliable creative workflow.