Stable Video Diffusion: How to Use SVD for Video Generation
If you want to turn a single image into a short AI video clip, Stable Video Diffusion gives you one of the simplest open-source image-to-video workflows to start with.
What Stable Video Diffusion Is and When to Use It
SVD as an image-to-video model
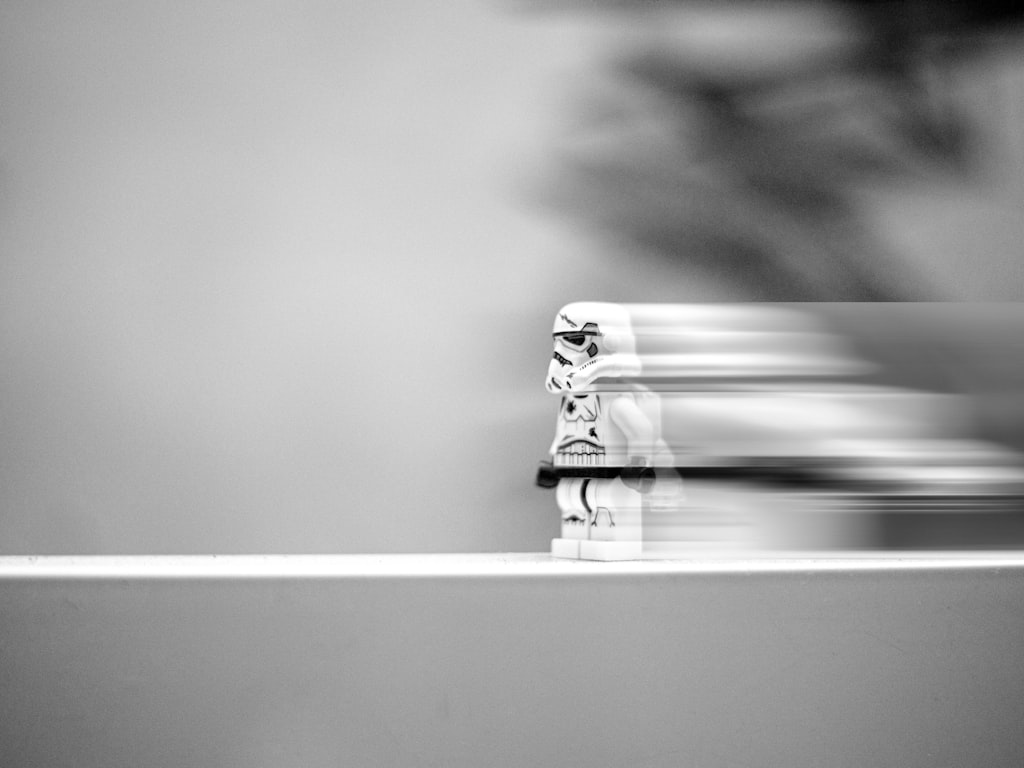
Stable Video Diffusion, usually shortened to SVD, is first and foremost an image-to-video open source model. Its main job is not to invent an entire scene from a text prompt alone. Instead, it takes a still image and animates it into a short clip. That distinction matters, because your input frame does a huge amount of the creative work. If the image has strong composition, clear lighting, and a subject that suggests motion, SVD has a much easier time producing something that feels intentional.
That is one reason SVD has become such a popular starting point in the open source ai video generation model space. You can begin with an image you already like, then add motion rather than gambling on full scene creation from scratch. For a first project, that is much more controllable than many text-to-video setups, especially if your goal is a polished short clip instead of a long sequence with multiple actions.
If you have been searching for a stable video diffusion svd guide because you want a practical entry point, this is exactly where SVD shines. It is approachable, the workflow is straightforward, and the output can look surprisingly strong when the source image is solid.
What kind of clips you can expect from SVD
The sweet spot for SVD is short motion shots: a portrait with subtle head movement, a product image with a cinematic camera drift, a landscape with gentle environmental motion, or stylized artwork that gains life through depth and animation. Tutorials and quickstart guides consistently frame it this way: take one image, generate one short clip, then refine.
That means expectations should stay grounded. SVD is great for subtle animation, loop-like social content, visual teasers, and concept motion studies. It is not the best tool for long-form scene generation, multi-shot storytelling, or heavily changing actions across many seconds. If you push it too hard, the motion can become chaotic or the subject can drift away from the original image.
A useful first batch of experiments is simple: animate a portrait with light camera motion, a sneaker product photo with a slow dramatic sweep, a sunset landscape with moving clouds, or an illustration with a touch of parallax. Those subjects tend to give SVD enough visual structure to create motion without asking it to solve too many problems at once.
When SVD is a better fit than a text-to-video workflow
SVD is a better fit than text-to-video when you already know what frame you want and mainly need motion. If you have a finished keyframe, product render, concept art piece, or portrait, image-to-video is usually faster and more predictable. The source image anchors color, framing, subject identity, and style, which helps a lot when consistency matters.
That practical control is why SVD still gets recommended so often alongside newer tools and even searches around things like the happyhorse 1.0 ai video generation model open source transformer. In the broader open source transformer video model landscape, SVD remains one of the easiest places to build intuition. You learn how motion, guidance, and fidelity interact without having to wrestle with full prompt-based scene generation.
If your goal is short-form content, especially clips for socials, motion posters, animated artwork, or product visuals, SVD is often the faster route. You are not asking the model to invent a world. You are asking it to move one image convincingly for a few seconds. That is exactly the job it was built to do.
Stable Video Diffusion SVD Guide: What You Need Before Your First Generation
Choosing a source image that animates well
The source image is the foundation of everything. With SVD, the input frame strongly shapes the final motion and visual consistency, so start with a clean, high-quality image that already looks like a frame from a video. Sharp subjects, readable lighting, and a clear focal point give the model structure to preserve while adding movement.
Images that animate well usually have one dominant subject and some obvious depth cues. A portrait with separation between face and background works well. A product shot with a strong silhouette and negative space around the object also tends to work. Landscapes with foreground, midground, and background layers can create nice motion, especially when the composition suggests gentle camera movement. Stylized artwork can work beautifully too, especially if the shapes are readable and the image is not cluttered.
Practical prep helps more than most people expect. Crop with intention. Community discussion around SVD 1.1 specifically mentions cropping as a real consideration, and that tracks with actual results. If the frame is too busy or the subject is too small, motion gets harder to control. Tighten the composition so the model knows what should matter most.
Checkpoint and UI workflow basics
The common beginner workflow is simple: load an SVD checkpoint, configure settings in a UI such as Forge, and generate from a still image. That pattern shows up repeatedly in tutorials because it works. You are not building some elaborate node tree on day one. You are loading the right model, feeding it a good image, setting a few key controls, and testing.
For a first run, the best move is to follow a quickstart guide’s suggested component settings instead of changing multiple controls at once. Civitai’s quickstart materials are especially useful because they present suggested settings for each SVD component or node, which removes a lot of random guessing. That matters because SVD has a few settings that can interact in ways that are not obvious at first.
If you want this stable video diffusion svd guide to save you time, the biggest shortcut is this: lock down a known-good baseline first. Do not tweak motion, augmentation, and guidance all together on the first generation and then try to figure out what happened.
Local setup and tool options
A lot of people exploring SVD also want to run ai video model locally rather than depend on hosted generation. SVD fits that goal well because it sits comfortably inside the broader open-source creative tool stack. A local setup gives you repeatability, privacy for client work, and the freedom to test many variations without usage caps.
Forge UI is a practical option because tutorials already show a straightforward SVD flow inside it: select checkpoint, load image, set parameters, generate clip. If your priority is getting from still image to first result fast, that is a very friendly route. Other interfaces exist too, but Forge is easy to follow because there are already step-by-step video examples built around it.
For searchers comparing options across the image to video open source model ecosystem, SVD is one of the strongest entry points because it is focused and proven. You are not trying to master every emerging open source ai video generation model at once. You are starting with a workflow that reliably teaches the basics of animated image generation. Once that clicks, branching into newer open source transformer video model pipelines becomes much easier.
Best Stable Video Diffusion Settings for a Strong First Result
Motion bucket ID starting points
If you want a strong first result, motion bucket ID is one of the first settings to get right. Community-tested advice for SVD 1.1 consistently points toward keeping motion bucket below 100, with around 75 often recommended as a very solid starting point. That range matters because motion is where SVD can either look elegant or fall apart fast.
At higher values, motion can become too aggressive. Faces may shift unnaturally, products can wobble, and backgrounds may start changing in distracting ways. A motion bucket around 75 tends to produce movement that feels present without becoming chaotic. That is especially useful for portraits, artwork, and product clips where controlled movement usually looks better than dramatic action.
For practical testing, start at 75, render one clip, then compare against a lower and a slightly higher version. A simple sequence like 60, 75, and 90 will teach you a lot. If 90 feels unstable and 60 feels too still, you already know your image probably lives around the middle.
Augmentation level recommendations
Augmentation is another setting where a small change can make a big difference. Common recommendations from community discussion place augmentation in the 0.01 to 0.04 range. That is a useful first test window because it is low enough to keep the input image recognizable while still allowing some motion flexibility.
Treat augmentation as a controlled adjustment, not a random creativity slider. If you push too high too early, you can end up introducing instability and visual drift that make it hard to tell what the model is doing. Staying in the low range keeps your tests readable. If your image is already strong and you mostly want subtle motion, begin near 0.01 or 0.02. If the result feels too locked and needs a little more movement freedom, try 0.03 or 0.04.
This is one of those details that turns a vague tutorial into an actually useful stable video diffusion svd guide. Instead of saying “experiment,” it is better to start with a narrow range that people already use successfully.
Guidance strength and image fidelity
Guidance strength is where min_scale and max_scale come in. These parameters affect how strongly the output stays aligned with the source image. Based on user reports and settings discussions, increasing min_scale and max_scale strengthens the guidance signal, which helps when the generated clip starts drifting away from the original frame.
That makes these settings especially important for portraits, branded product visuals, and any clip where identity and shape consistency matter. If your source image shows a specific face, package design, or detailed illustration, stronger guidance can help hold those visual features together over the clip.
The tradeoff is simple: more guidance usually means more fidelity, but too much can reduce the sense of motion or make the result feel constrained. So the best workflow is to use guidance as a stabilizer when needed, not as the first thing you max out.
A simple baseline preset to copy for a first round looks like this: start with a clean cropped image, set motion bucket to around 75, keep augmentation between 0.01 and 0.04, and use stronger min_scale and max_scale if the video stops resembling the source image. Generate one clip, inspect where it fails, and only then move one control. That process will get you farther than trying to invent a “perfect” custom setup before you have even seen your first result.
How to Tune Stable Video Diffusion SVD for More Motion, Less Drift, and Better Consistency
If motion looks too chaotic
When motion gets weird, the first thing to check is the motion bucket value. Community feedback around SVD 1.1 repeatedly points to lower motion bucket settings producing more pleasing motion. If your clip has jittery body movement, unstable backgrounds, or dramatic warping, reduce motion bucket before touching everything else. A drop from 90 to 75, or even down toward 60, often brings the result back under control.
Also look at the image itself. Busy compositions can exaggerate unstable motion because the model has too many competing shapes to animate. A tighter crop around the subject, cleaner background separation, or a composition with more obvious depth can improve stability before you change a single parameter. This is especially true for portraits and product shots.
Augmentation matters here too. If you are already in the recommended 0.01 to 0.04 zone, move within that range carefully. If motion is chaotic and augmentation is near 0.04, step it down closer to 0.01 or 0.02 and render again.
If the video drifts away from the original image
Drift usually shows up as identity loss, shape changes, texture crawling, or the subject gradually turning into something only vaguely related to the source image. When that happens, increase min_scale and max_scale. Stronger guidance helps the model stay more faithful to the input frame, and this is one of the most useful fixes when SVD starts freelancing too much.
This is especially effective for clips based on faces, product packaging, logos, or art styles that need consistency. If you are animating a beauty portrait and the face starts changing across frames, or a product bottle starts bending and relabeling itself, guidance is the lever to pull. Raise it modestly, render again, and compare.
Image prep also plays a role in drift. If the subject is tiny in the frame, the model has less structure to preserve. If possible, crop closer so the important details occupy more of the image. Better composition often reduces the amount of guidance you need.
If the output feels too static
Sometimes the opposite problem shows up: the clip barely moves. In that case, increase motion in measured steps rather than jumping to extreme settings. If you started around 75, test 85 next, then compare. Keep the movement progression gradual so you can tell whether the clip is improving or just becoming unstable.
You can also nudge augmentation upward inside the low recommended range. If you were at 0.01, try 0.03. That can give the model a little more freedom without immediately wrecking fidelity. The key is to avoid changing motion bucket and augmentation at the same time unless you are doing a deliberate two-variable test. If you change both and the result improves or fails, you will not know which setting actually caused it.
The most reliable tuning loop is simple: prepare a stronger crop, run a baseline, then adjust one parameter per generation. That makes SVD feel much less mysterious. Once you do a few rounds, patterns emerge quickly: lower motion when things break, raise guidance when fidelity drops, and use augmentation in the low range as a fine control rather than a wild card.
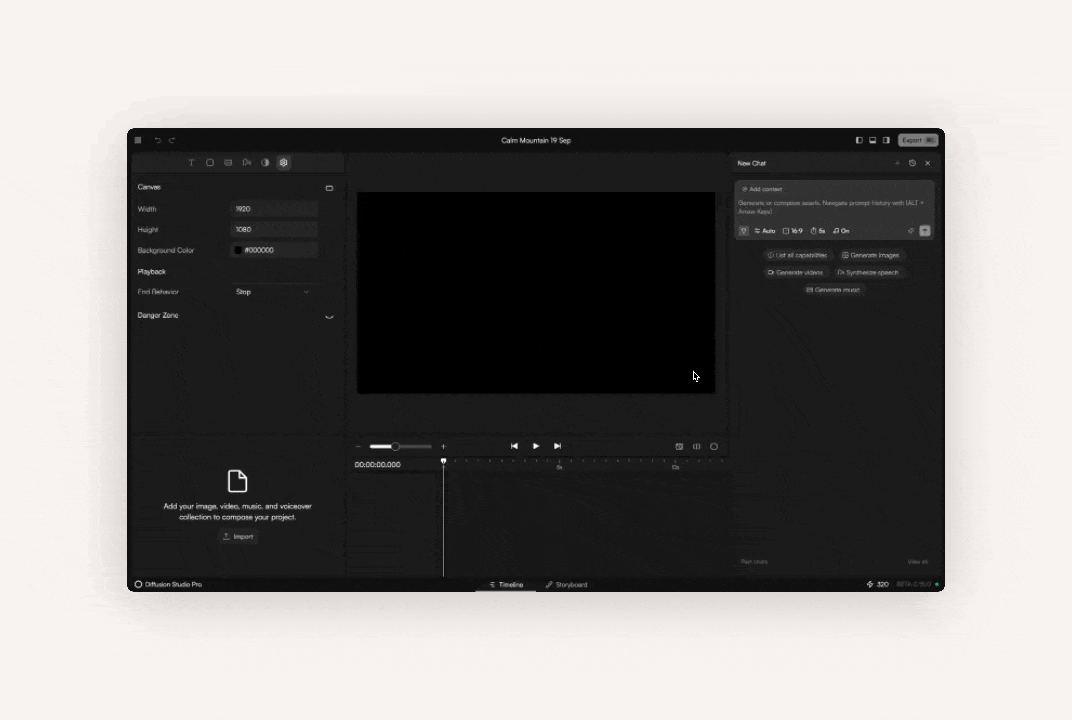
A Simple Stable Video Diffusion Workflow in Forge UI and Post-Processing Tools
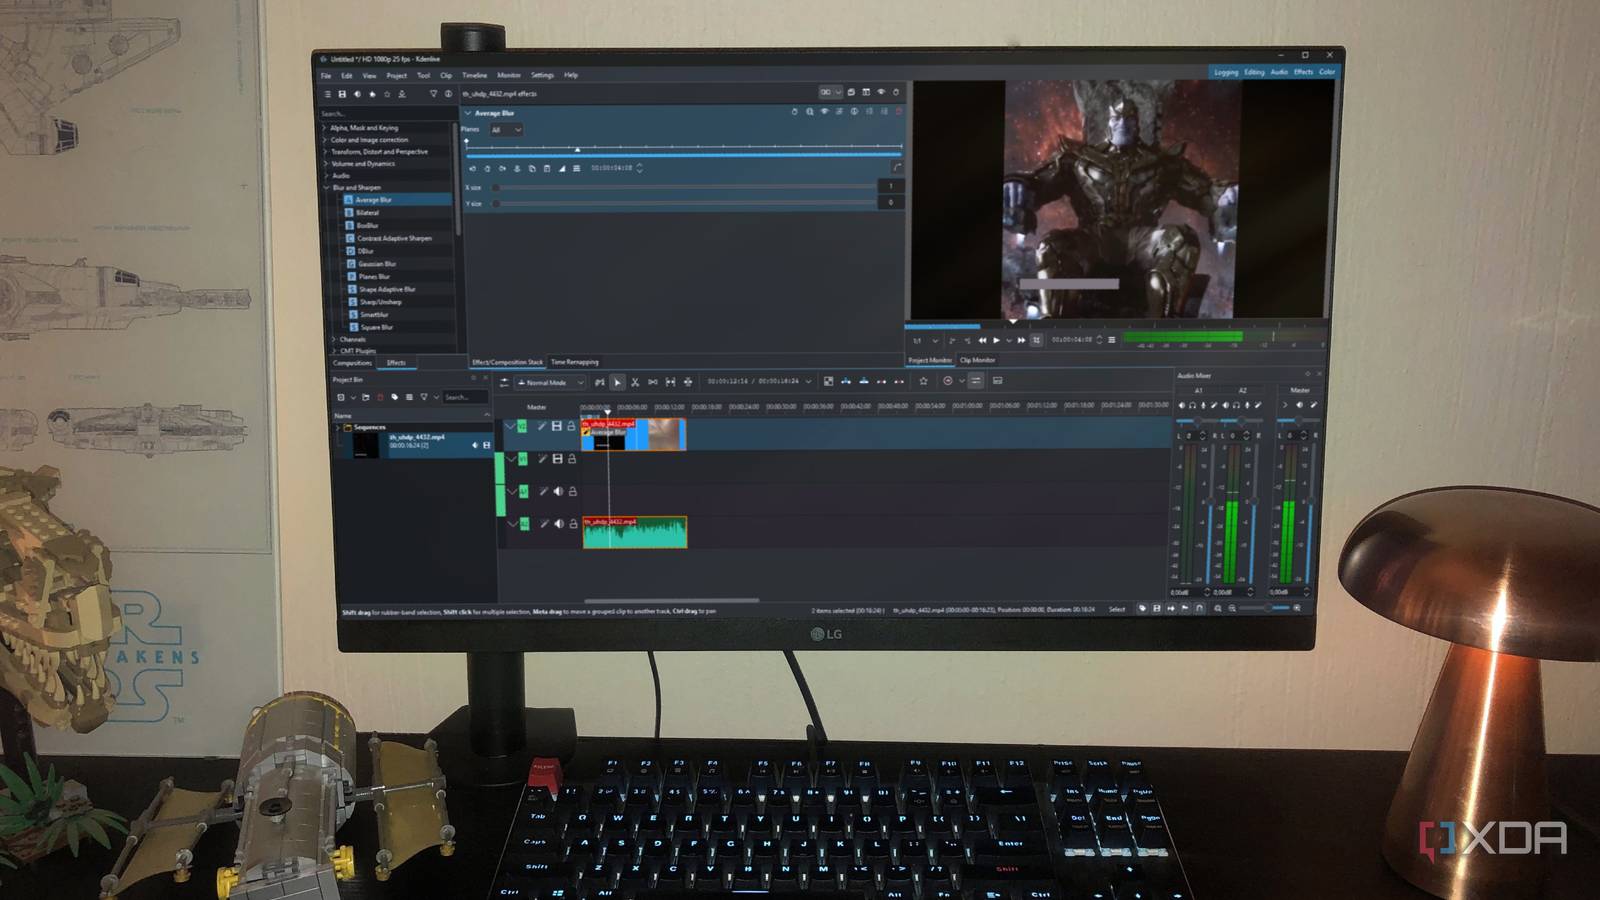
Basic Forge UI generation flow
A straightforward Forge UI workflow mirrors what many practical tutorials already show. First, choose the SVD checkpoint you want to use. Next, load your source image. Then set your core parameters: motion bucket, augmentation, and any guidance-related values such as min_scale and max_scale. After that, generate the clip and review the result before making any changes.
That sounds basic, but the order matters. If you follow the same sequence every time, troubleshooting gets much easier. Use one carefully prepared image and make three or four controlled generations rather than throwing ten different images into the queue with random settings. You will learn faster from consistent tests than from chaotic volume.
A very usable first pass in Forge is: load a clean portrait, product shot, landscape, or artwork; set motion bucket around 75; keep augmentation low; use stronger guidance if needed for fidelity; then render. Save that result, duplicate the setup, and only change one parameter for the next version.
Exporting and reviewing your clip
Once the clip is generated, do not just decide based on a quick glance. Review it for three specific things: motion quality, image fidelity, and frame-to-frame consistency. Motion quality asks whether the clip actually feels alive. Fidelity checks whether it still looks like your source image. Consistency is where you catch subtle drift, texture noise, and shape instability.
A repeatable review process helps a lot. Keep notes on each render: motion bucket value, augmentation value, guidance changes, and what improved or got worse. This becomes especially useful if you plan to run ai video model locally and iterate often, because local workflows reward organized testing. Without notes, it is easy to lose track of why one clip looked better than another.
When a result is promising but not perfect, resist the urge to overhaul the entire setup. Export the clip, compare it against the previous version side by side, and adjust only the most obvious weak point. That habit saves time and builds intuition quickly.
When to upscale with Topaz Video AI
Many creators treat SVD as the motion-generation step, not the final polish. That is why tutorials often pair Forge UI with Topaz Video AI for upscaling. The logic is practical: use SVD to create the movement, then hand the clip off to a dedicated enhancement tool if you need cleaner delivery quality.
This is especially useful for social media outputs, marketing visuals, and portfolio clips where the motion itself is already good but the final presentation could look sharper. Topaz Video AI is often brought in after generation because it is designed for video enhancement, while SVD is focused on animation from a still image.
That broader workflow is worth adopting mentally. SVD is one piece of a larger open source transformer video model process. You might generate the base animation in SVD, upscale in Topaz Video AI, trim or grade in an editor, and package the result for delivery. Thinking this way also helps when you compare SVD to other tools in the open source ai video generation model space. It does not need to do everything alone. It just needs to do the motion step well.
Stable Video Diffusion SVD Guide: Practical Tips, Common Mistakes, and Next Steps
The fastest way to improve your first few generations
The fastest improvement path is boring in the best way: start with suggested default settings from quickstart resources, use a strong source image, and only then branch into custom tuning. Civitai quickstart materials are useful here because they frame settings as suggested values for each SVD component. That gives you a stable launch point instead of a pile of sliders with no context.
For most first tests, the most useful community-tested pattern is straightforward: motion bucket around 75, augmentation in the low 0.01 to 0.04 range, and stronger guidance when fidelity drops. That baseline covers the most common failure modes without overcomplicating your setup.
A second fast win is image selection. If a clip fails badly, the image may be the problem as much as the settings. Swap in an image with cleaner framing, better subject separation, and less background clutter before you assume the model is broken. In practice, better source material often improves results faster than deeper parameter tweaking.
Mistakes beginners make with SVD settings
The biggest mistake is changing motion bucket, augmentation, and guidance settings all at once. That makes troubleshooting almost impossible. If the output gets better, you do not know why. If it gets worse, you do not know which setting caused it. SVD rewards controlled iteration, not random experimentation.
Another common mistake is using an image that is too busy, too low quality, or badly cropped. Because SVD is an image-to-video system, the source frame is not a suggestion; it is the backbone of the result. If the subject is tiny, the lighting is muddy, or the composition is confusing, the generated motion often reflects those weaknesses.
One more trap is expecting SVD to behave like a long-form text-to-video generator. It is better to use it for short clips, subtle motion, and social-friendly outputs. If you want one strong animated shot from a still image, SVD is excellent. If you want a multi-scene narrative, look at adjacent tools instead of forcing SVD into the wrong role.
How to expand into more open-source video workflows
Once SVD clicks, the next step is usually expanding into neighboring workflows. That might mean comparing other open source ai video generation model options, following development around newer open source transformer video model projects, or testing niche releases that come up in searches like happyhorse 1.0 ai video generation model open source transformer. By then, you will already understand the basics of motion control, source-image dependency, and fidelity tuning, which transfers surprisingly well.
It is also smart to check practical issues like open source ai model license commercial use before building client or product workflows around any model. Different projects have different license terms, and that matters if you plan to monetize outputs, build services, or create branded content at scale.
If you want to keep this stable video diffusion svd guide useful beyond one afternoon of testing, treat SVD as your foundation. Learn image prep, motion tuning, guidance control, and post-processing with it. Then branch into newer models with a clear eye for what each tool is actually best at.
Conclusion
Stable Video Diffusion is one of the quickest ways to animate a still image into a usable short clip, and it gets much easier once you stop treating the settings like a mystery. Start with a strong source image, use proven baseline values like motion bucket around 75 and low augmentation, and raise guidance when the output drifts too far from the original frame.
The real gains come from disciplined testing. Change one setting at a time, keep notes, and judge each clip on motion, fidelity, and consistency. If the motion looks chaotic, lower motion bucket. If the image starts slipping, increase min_scale and max_scale. If the clip feels too static, nudge motion or augmentation carefully inside the commonly recommended range.
And do not expect SVD to be the entire pipeline. It works best as the motion-generation stage, with post-processing tools like Topaz Video AI handling upscale and finishing when needed. With that workflow, you can get noticeably better clips fast and build a reliable process for everything from animated portraits to product visuals and stylized social content.