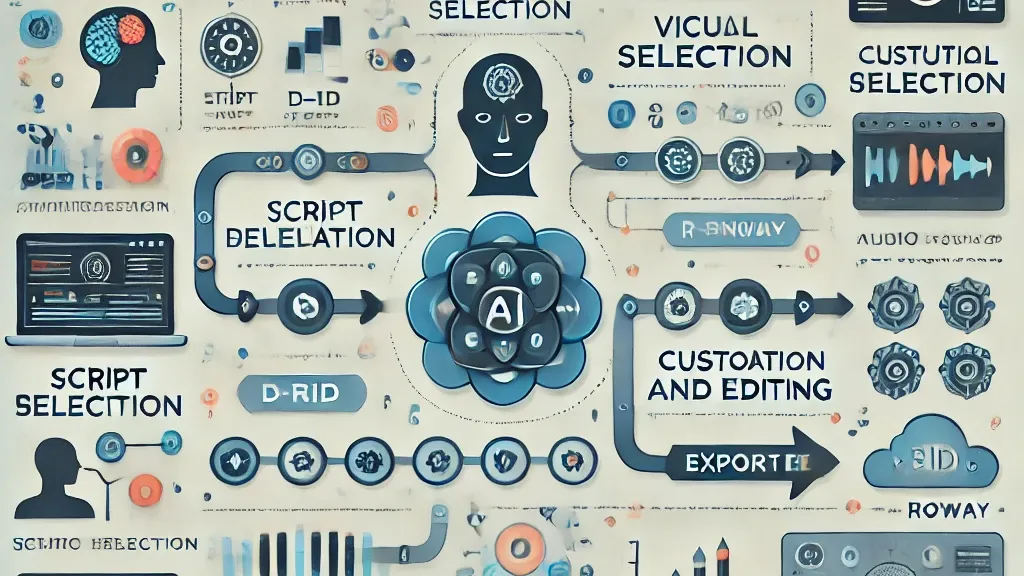
AI Video Upscaling and Super-Resolution Models: A Practical Guide
If your footage looks soft, noisy, pixelated, or dated, the right AI video upscaling super resolution model can often recover cleaner detail and make it usable for modern screens.
What an AI Video Upscaling Super Resolution Model Actually Does
Video super resolution vs basic resizing
A true video super resolution workflow is not the same thing as dragging a 480p file onto a 4K timeline and exporting bigger. Basic resizing just stretches existing pixels. An ai video upscaling super resolution model uses AI-based video up-sampling to intelligently enlarge low-resolution video streams and predict cleaner structure between pixels. That distinction matters because simple scaling preserves blur, compression blocks, and jagged edges, while super resolution tries to rebuild a more believable image from weak source material.
A useful way to think about it is this: resizing makes the video larger, but super resolution tries to make it clearer at the same time. That lines up with how video super resolution is described in VSR explainers: AI-based up-sampling that improves video detail beyond standard resizing. Some AI super-resolution systems are also marketed as being trained on enormous image sets; one explainer even claimed training on 20 million images to help the model interpret highly pixelated inputs. Even when those claims are promotional, the practical takeaway is clear: these models are built to recognize patterns like skin texture, edges, hair, text, and repeated scene structure.
What kinds of detail AI can improve
The biggest gains usually come from footage with common damage patterns, not impossible miracles. AI upscaling tools are repeatedly used for blurry, noisy, low-resolution, old or degraded, interlaced, and combed footage. If you have a mushy 720p export, DVD-era SD material, a noisy phone clip, or old family footage with visible combing lines, these are exactly the kinds of clips where the right model choice can change the result.
In practice, AI can improve edge definition, reduce visible noise, tighten text, clean compression artifacts, and make faces read more clearly from a normal viewing distance. It can also help with blur recovery when the source is only mildly soft, and some tools combine denoising, deblurring, and upscaling in one pass. Aiarty Video Enhancer, for example, is specifically promoted for improving clarity, removing noise, fixing blur, and upscaling low-resolution or old footage. That combination is why many editors treat enhancement as more than just “make it 4K.”
When results are realistic and when they are limited
The key is to expect improved usable detail, not perfect reconstruction of everything that was lost. If the source has heavy motion blur, crushed shadows, overexposed highlights, or extreme compression smearing, the model can only infer so much. AI often enhances perceived sharpness and texture, but it cannot reliably recover a license plate that was unreadable in every original frame or recreate authentic skin pores from a blocky 240p clip.
The realistic win is this: footage that looked too soft, noisy, or dated for current displays can often become cleaner, steadier, and much easier to watch. The hard limit is missing information. If details never existed in the source, the model will estimate them, and sometimes those guesses look artificial. That is why super resolution works best when you treat it like restoration and optimization, not magic. The smartest workflow is to improve what is there, control artifacts, and stop before the image starts looking synthetic.
How to Choose the Best AI Video Upscaling Super Resolution Model for Your Footage
Match the model to your source video
Picking the best model starts with diagnosing the source before you touch any settings. A blurry clip needs a different approach than noisy footage, and old interlaced tape transfers need a different path from a clean but low-res web export. If your source is mostly soft, prioritize a model known for blur recovery. If it is crawling with grain or sensor noise, favor stronger denoising and artifact cleanup. If it is old, degraded footage with faded detail, use gentler restoration settings first so you do not turn damage into crunchy fake texture. For interlaced archival material, identify that problem immediately because the fix is structural, not cosmetic.
This is where one-click defaults often miss. The research-backed takeaway from the TopazLabs workflow discussion is that model selection matters more than convenience, especially on low-quality footage. The fastest preset is not automatically the best result. A low-bitrate 480p camcorder rip, a VHS capture, and a blurry 1080p smartphone clip may all benefit from AI enhancement, but they should not be sent through the same model with the same settings.
What matters more than advertised resolution
Do not get distracted by “up to 4K” marketing alone. Output resolution is only one part of the result, and often not the most important part. What matters more is how a tool handles denoising strength, blur recovery, compression artifacts, old-footage cleanup, and motion issues. A tool that can produce 4K output but leaves halos around faces or smears details in motion is less useful than one that gives you a more natural 1080p master.
Evaluate tools on practical behavior. Can it reduce noise without waxy skin? Can it recover edges without over-sharpening? Does it handle damaged footage conservatively? Does it support frame interpolation if you want smoother motion later? Nero AI Video Upscaler is notable here because it is described as an affordable option with 5 AI models, plus frame interpolation up to 120 FPS. That means you get multiple model behaviors to test instead of being stuck with one style of enhancement. Topaz Video AI is widely used when you need more advanced control, while Aiarty is especially appealing for blur and noise cleanup in the same workflow.
A quick decision checklist before you render
Before any full export, run this checklist:
- Identify the source resolution. Know whether you are starting from SD, 720p, 1080p, or a heavily compressed unknown. That determines whether 1080p is enough or whether 4K is worth the render time.
- Check for interlacing. Scrub frame by frame and look for combing on motion edges. If you see horizontal tearing-like lines, deinterlace first.
- Decide the output target. For YouTube, client delivery, or TV playback, 1080p may be the sweet spot. Jump to 4K only if the source can support it or the platform requires it.
- Match the model to the problem. Blur-focused model for softness, denoise-focused model for noisy footage, restoration-oriented model for old degraded clips.
- Test a short segment. Export 10 to 20 seconds with motion, faces, text, and dark areas. Compare before/after at 100% view.
That same test-first mindset also applies if you work with adjacent tools like an open source ai video generation model, an image to video open source model, or want to run ai video model locally for other parts of your pipeline. Upscaling and generation are different jobs, but the same rule holds: inspect the source, pick the right model, and validate output on short samples before committing hours of render time.
Best AI Video Upscaling Super Resolution Model Tools to Try
Paid desktop tools
If you want the strongest quality control, desktop tools are usually the first stop. Aiarty Video Enhancer is a practical choice when the source has a mix of blur, noise, and low resolution. It is specifically promoted for improving clarity, removing noise, fixing blur, and upscaling old or low-res footage, which makes it useful when you are trying to rescue material rather than just enlarge it. If your clip needs both cleanup and enlargement, that combination saves time.
Topaz Video AI is the tool many people reach for when they need a deeper restoration workflow. The key advantage is not just “better AI,” but the way it supports model-based decision making. In real use, that matters most on low-quality footage, archived video, and interlaced sources where sequence and model choice can make or break the result. If you need to deinterlace, recover detail, then optionally add interpolation, Topaz fits that layered workflow well.
Nero AI Video Upscaler stands out on value. Based on the notes, it is described as an affordable alternative with 5 AI models, basic AI upscaling, and frame interpolation up to 120 FPS. That makes it attractive if you want flexibility without the higher price of flagship desktop tools. Having multiple models is especially useful when one clip responds better to stronger denoise and another responds better to cleaner edge handling.
Free and online upscalers
If you need speed, convenience, or a no-install test, online tools are hard to beat. Canva Free Video Upscaler is positioned as a free way to enhance low-resolution clips in just a few clicks. That makes it a practical option when you want a quick enhancement for social content, previews, or simple client deliverables without setting up desktop software.
TensorPix pushes convenience even further. It claims online enhancement and upscaling in less than 3 minutes, with free use, no sign-up, and no installation needed. That is ideal for short validation passes: upload a small sample, see whether the model helps, then decide whether the clip deserves a more controlled desktop restoration.
Generic online AI upscalers also advertise output to 1080p or 4K with one-click sharpening and detail enhancement. Those services can be handy for low-stakes jobs, but quality varies a lot. Fast output is useful, yet heavily compressed or damaged footage usually benefits from tools that let you tune denoise, deblur, and preprocessing instead of forcing a single preset.
Which tool fits which workflow
Use desktop software if quality matters more than convenience, if the footage is archival, or if you need control over deinterlacing, denoising, blur recovery, and frame interpolation order. Use online upscalers if you need a quick test, a light enhancement, or do not want to install anything.
A simple breakdown works well:
- Aiarty Video Enhancer: best when blur and noise are the main pain points.
- Topaz Video AI: best for advanced restoration workflows and difficult sources.
- Nero AI Video Upscaler: best for affordability plus multiple AI models and interpolation.
- Canva: best for simple, free, quick enhancement.
- TensorPix: best for rapid browser-based tests and no-install use.
If your broader workflow also includes experimenting with tools like the happyhorse 1.0 ai video generation model open source transformer, an open source transformer video model, or checking an open source ai model license commercial use, keep those projects separate from restoration decisions. Video generation tools can create motion from prompts or images, but an ai video upscaling super resolution model is still the better tool when your goal is to improve existing footage rather than synthesize new frames from scratch.
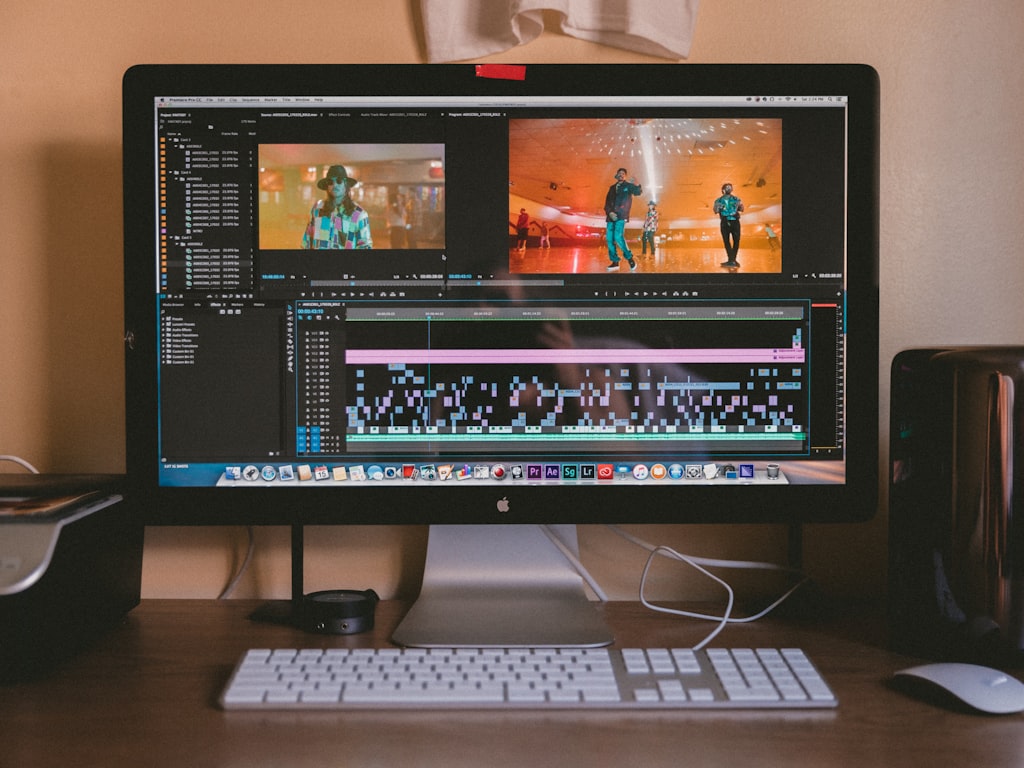
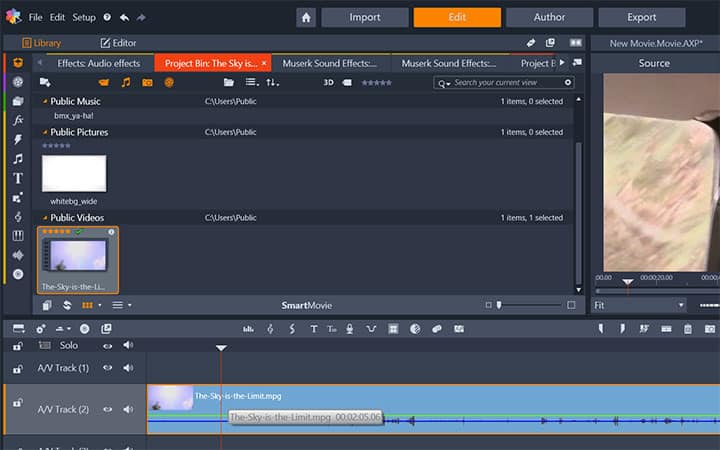
Step-by-Step Workflow for Better Results with an AI Video Upscaling Super Resolution Model
Prepare the clip before enhancement
The best results usually come from five quiet minutes of inspection before any render starts. First, open the clip and scrub through it frame by frame. Look for noise in shadows, blur on faces, compression blockiness, and any signs of interlacing. Interlaced material often reveals itself through combing artifacts on moving objects, especially hands, hair, or horizontal edges. If you miss that step and upscale first, those artifacts will become bigger and uglier.
Next, trim a short sample. Pick 10 to 20 seconds that includes motion, skin tones, fine edges, text, and a darker section if possible. This small test clip becomes your decision lab. It lets you compare models without waiting hours, and it prevents full-length renders based on settings that only looked good on a static frame.
Run the upscale in the right order
Order matters more than many presets suggest. For older interlaced footage, the community workflow from TopazLabs recommends deinterlacing first using a deinterlacing model such as Dione TV. The reason is practical: it removes combing artifacts and improves motion handling before enlargement. Once the combing is gone, the rest of the enhancement process has a cleaner base to work from.
After deinterlacing, address noise or blur. If the footage is noisy, apply moderate denoising first so the upscaler does not mistake random noise for real texture. If it is soft, use blur recovery carefully; too much sharpening before upscale can create halos that get amplified. Then run the upscale to your chosen target, typically 1080p or 4K depending on the source and delivery needs.
Only after cleanup and upscaling should you consider frame interpolation for smoother motion. The same TopazLabs workflow notes recommend enabling interpolation, but it works best as a later stage. If you interpolate first, you risk creating extra frames from damaged or combed source material. Clean the clip, enlarge it, then smooth motion if needed.
Export settings to check before final output
Before rendering the full video, check three things: codec, bitrate, and scaling target. Use a modern codec and enough bitrate to preserve the improvements you just created. There is no point in recovering cleaner edges and then crushing them with an overly aggressive export. For many jobs, a high-quality 1080p export is more efficient and more natural-looking than forcing 4K from weak source material.
After the test render, compare your sample side by side with the original. Inspect faces, text, diagonal edges, and motion. If the upscaled version looks clearer without plastic skin, ringing, or flicker, move to the full export. If not, swap models or reduce denoise and sharpening. This is the heart of a practical ai video upscaling super resolution model workflow: inspect, test, compare, then commit.
Fixing Blurry, Noisy, Old, and Interlaced Video with the Right Super Resolution Model
Best settings for blurry and noisy clips
Blurry and noisy footage can improve dramatically, but they need different treatment. For blurry clips, start with moderate blur recovery rather than maximum sharpening. Strong sharpening often creates halos around faces and hard edges that look fake on playback. A cleaner approach is to recover edge definition gradually, then upscale. Tools like Aiarty are attractive here because they are specifically positioned to improve clarity, fix blur, and remove noise in the same workflow.
For noisy clips, denoising should be stronger than sharpening. If the model sees heavy noise, it may invent gritty texture that was never real. Reduce the noise first, but stop before skin and dark surfaces turn waxy. The sweet spot is where shadow crawling is reduced and edges still hold their natural transition. Test noisy footage on a short section with movement, because some settings look fine on a paused frame but smear detail during motion.
How to restore old or degraded footage
Old and degraded footage usually benefits from a conservative hand. That includes faded videotape transfers, compressed archives, and clips with general softness plus age-related artifacts. The goal is not to make old footage look natively shot in 4K. The goal is to make it cleaner, more stable, and more watchable on current displays. Start by reducing the most distracting defects—noise, mild blur, and compression mess—before asking the model to enlarge everything.
A good pattern is: gentle cleanup, then upscale to the smallest target that still solves the delivery problem. If the source is very weak, 1080p is often a smarter choice than 4K. Overreaching can exaggerate errors and make damage look artificial. This is one reason advanced tools outperform one-click web upscalers on archival jobs: you can keep settings restrained and adapt to what each clip can actually support.
What to do with interlaced and combed video
Interlaced and combed video needs a specific fix. The TopazLabs community guide recommends using a deinterlacing model first, specifically noting Dione TV as a workflow option. That recommendation exists for a good reason: deinterlacing removes combing artifacts and gives smoother motion before any upscale is attempted. If you skip this and enlarge first, the comb lines become more obvious and harder to clean up later.
After deinterlacing, proceed with denoise or blur correction if needed, then upscale. If you want smoother playback for sports, archival TV, or certain documentary clips, add frame interpolation after restoration. That sequence is important. Interpolation works better when it is building new motion from cleaner, deinterlaced frames rather than from damaged ones. Whether you are restoring old broadcasts or combed SD captures, this order consistently produces more stable results.
Common Mistakes to Avoid When Using an AI Video Upscaling Super Resolution Model
Settings that often make footage look worse
The easiest way to ruin an otherwise good restoration is to push sharpening and denoising too far. Over-sharpening creates bright halos, crunchy edges, and weird fake texture in hair or fabric. Over-denoising creates waxy skin, smeared shadows, and flat surfaces that look painted. If your first reaction to the output is “wow, that’s sharp,” pause and check whether the detail actually looks natural in motion.
Another common mistake is expecting every clip to benefit from maximum upscale. A weak SD source does not automatically become better because it was forced to 4K. Sometimes 1080p preserves realism better and renders faster. Bigger is not always cleaner.
How to avoid wasting render time
The single best time-saver is to test short clips first. Render a section with a face, text, movement, and darker tones. Then try a second model on the same section. This quickly tells you whether the extra denoise is helping, whether the blur recovery is too aggressive, and whether 4K is worth the cost. Blind full-length renders waste hours and often end with settings you would have rejected in the first minute of review.
Do not upscale interlaced footage before deinterlacing. This mistake is especially expensive because the enlarged combing artifacts can force you into another long render just to undo the damage. Check for interlacing at the start, not after the export.
A simple quality-check routine
Use a consistent review routine every time:
- Faces: look for natural skin texture, eyes, and hair without plastic smoothing.
- Edges: inspect outlines on clothing, buildings, and diagonal lines for halos or stair-stepping.
- Motion: watch panning shots and hand movement for shimmer, ghosting, or flicker.
- Text: pause on signs, subtitles, or UI elements to see whether readability improved or just became oversharpened.
- Dark scenes: check whether denoising removed crawling noise without crushing subtle detail.
If the clip passes those checks, the chosen ai video upscaling super resolution model is probably a good fit. If not, reduce the strength, switch models, or lower the target resolution. The best restorations usually look understated. They do not scream “AI.” They simply make the footage feel cleaner and more usable.
Conclusion
The best results come from matching the tool and model to the footage in front of you. Blur-heavy clips often benefit from tools like Aiarty that combine clarity recovery with noise cleanup. Tough archival jobs, interlaced sources, and deeper restoration workflows usually reward the extra control of Topaz Video AI. Budget-conscious projects can work well with Nero AI Video Upscaler, especially if you want multiple AI models and interpolation up to 120 FPS. For quick tests or simple browser-based enhancement, Canva and TensorPix are easy places to start.
The smart path is simple: inspect the source, check for interlacing, choose the model based on the actual problem, and test a short segment before any full render. If a 10-second sample looks better on faces, motion, edges, text, and dark scenes, keep going. If not, change the model or lower the target from 4K to 1080p. That short test-first process will save time, preserve realism, and help you get the most out of every clip you restore.